Natural Carpet Freshener
Combine 1 part dried bay leaves to 3 parts baking soda and pulverize it all in the blender. Pet and Child Safe! You can also do this with cloves, cinnamon, rosemary, depends on your scent preference! Store in an air-tight container, punch holes in the lid for sprinkling. One added benefit is that most pungent herbs and spices are natural bug and rodent repellents!
Combine 1 part dried bay leaves to 3 parts baking soda and pulverize it all in the blender. Pet and Child Safe! You can also do this with cloves, cinnamon, rosemary, depends on your scent preference! Store in an air-tight container, punch holes in the lid for sprinkling. One added benefit is that most pungent herbs and spices are natural bug and rodent repellents!
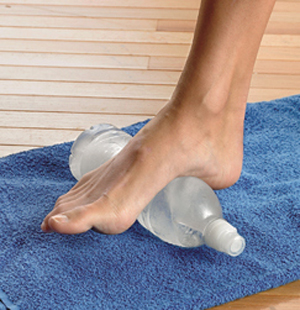
Sore Feet Relief
If you have plantar fasciitis or tired, achy feet, fill a plastic water bottle 3/4 of the way with water, freeze it and use it frozen after a workout or long day to roll the bottoms of your feet to reduce inflammation.
If you have plantar fasciitis or tired, achy feet, fill a plastic water bottle 3/4 of the way with water, freeze it and use it frozen after a workout or long day to roll the bottoms of your feet to reduce inflammation.
Avoiding Container Stains
Spray the inside of plastic storage containers with cooking spray before putting tomato-based sauces like chili and spaghetti inside. The spray keeps the container from getting stained
Spray the inside of plastic storage containers with cooking spray before putting tomato-based sauces like chili and spaghetti inside. The spray keeps the container from getting stained

For Neck and/or Shoulder Pain,
Fill a tube sock with regular rice and tie a knot. Put the rice sock in your microwave for a minute or two, then put it around your neck. It stays warm for quite a while and if you have stiff shoulders or arthritis pain it feels like heaven. You can also put it in the freezer for an ice pack.
Fill a tube sock with regular rice and tie a knot. Put the rice sock in your microwave for a minute or two, then put it around your neck. It stays warm for quite a while and if you have stiff shoulders or arthritis pain it feels like heaven. You can also put it in the freezer for an ice pack.
Dry, Scaly Hands, BE GONE!
In your hand, pour 2 tsp. sugar, 1 – 2 tsp. olive oil and two pumps hand soap. Rub together into cuticles, and in between fingers until sugar is mostly dissolved. Rinse. Apply a bit of your favorite lotion.
In your hand, pour 2 tsp. sugar, 1 – 2 tsp. olive oil and two pumps hand soap. Rub together into cuticles, and in between fingers until sugar is mostly dissolved. Rinse. Apply a bit of your favorite lotion.
Cooktop Cleaner
Sprinkle on baking soda, then use a spray bottle filled with vinegar and squirt the baking soda until it’s foamy, but not diluted. Let it sit for about 5 – 10 minutes and then it wipes away clean with no scrubbing
Sprinkle on baking soda, then use a spray bottle filled with vinegar and squirt the baking soda until it’s foamy, but not diluted. Let it sit for about 5 – 10 minutes and then it wipes away clean with no scrubbing
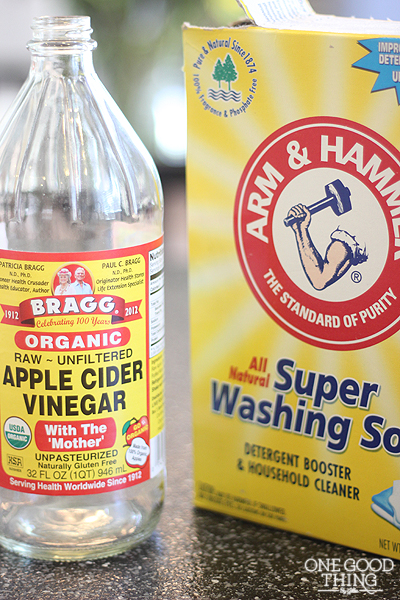
How to Remove Labels From Glass Bottles
Fill sink with hot water and add about of cup of Washing Soda. Let soak and then lift off the label.
http://www.onegoodthingbyjillee.com
Fill sink with hot water and add about of cup of Washing Soda. Let soak and then lift off the label.
http://www.onegoodthingbyjillee.com
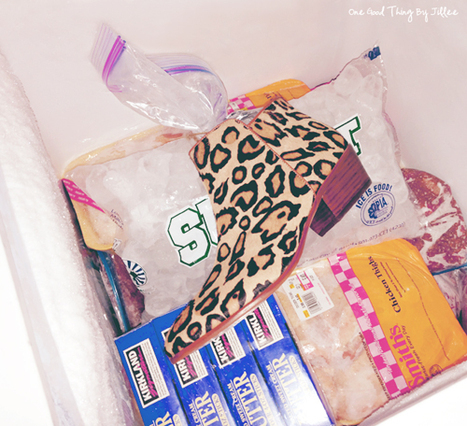
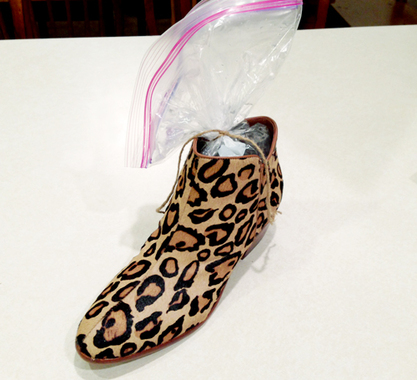
How to Stretch Too Tight Shoes
I took TWO zippered plastic bags, put one inside another (just to be safe!), and jammed them down into the shoe as far as they would go. I then carefully filled the bag with water and tied a piece of string around the top as another safety measure. IREALLY didn’t want to ruin these great shoes with my unproven attempt to get a little more wiggle room in them.
First I tried setting the shoe outside because it has been SO cold here lately…I figured it wouldn’t take long before it was frozen solid! Wrong. Several hours later it was still a bit slushy so into the DEEP FREEZE it went. Boy oh boy…they don’t call it a DEEP freeze for nothing! A few hours later it was frozen rock solid! The fact that it was so tightly wedged in the shoe that I couldn’t even unzip it gave me hope that some real stretching was taking place.
After letting it thaw for a few hours on the kitchen counter I was able to pry the bag out of the shoe and tried the shoe on again. A huge improvement! As a matter of fact, they felt so good I didn’t want to take them off! So for a good hour or so last night I walked around the house in my fancy new boots and my pajamas. :-)
Maybe I could rock THAT look at AltSummit? I wish!!!
MORE Shoe Stretching ideas:
Stretching with Rubbing Alcohol
Grab a spray bottle and fill it up with some rubbing alcohol. Spray the inside of your shoes until they are slightly damp and pop them on your bare feet. Strut around in them until the alcohol dries. Repeat if your shoes are still a bit snug as many times as needed.
Hairdryer/Socks Method
Put on a thick pair of socks (or as thick as will fit!) and slip on your shoes. Aim a hairdryer on the tight section for a few seconds while wiggling your toes and and bending your feet inside the shoe. Keep the shoes on while they cool. If you need more room, repeat the process again.
http://www.onegoodthingbyjillee.com
Carpet Spot Cleaner
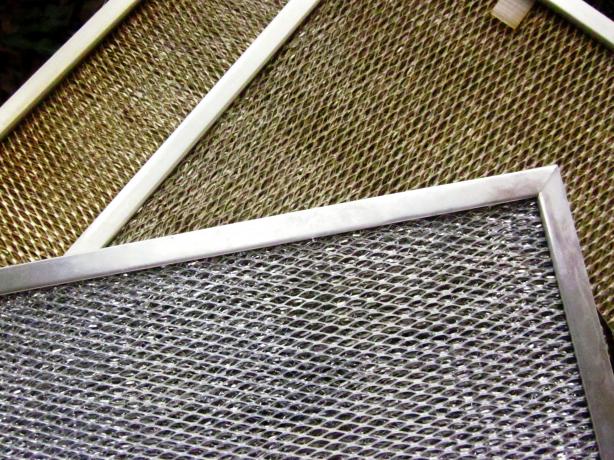
How to Clean Your Hood Filters
Ingredients:
1/2 cup baking soda
water
Directions:
Fill a large heat-resistant vessle, like a pot or flat rimmed baking sheet with baking soda. Add enough water to fill without spilling over. Place in the hood filter and turn up the heat to a slow simmer.
This takes about 5-10 minutes. Since I placed mine flat in a rimmed baking sheet, I was able to assist the removal of build up with a toothbrush. I, also, with tongs flipped the filter over. The water will foam, raising the residue to the top. Rinse thoroughly.
Repeat with remaining filters.
http://www.food.com/recipe/how-to-clean-hood-filters
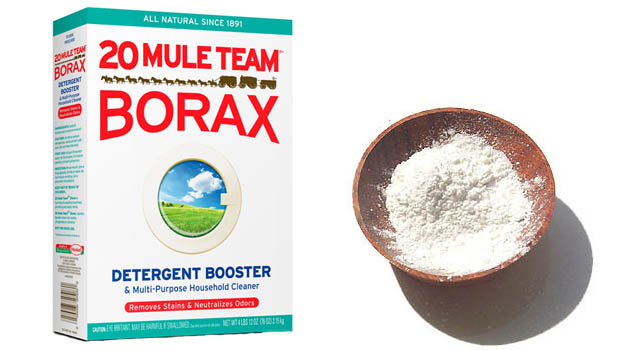
30 Little Known Uses for Household Borax
Carpet Cleaning
Use a 1/2 cup of Borax per gallon of water in carpet steam cleaning machines.
Fruit Trees
Sprinkle a cup of borax around a full-sized apple tree (or a couple of tablespoons around a young tree) every 3-4 years to add boron, a trace mineral, to the soil. It is needed for good cell wall growth and for fruit and seed development.
Toilet Bowl Cleaner
Pour 1 cup of borax into the toilet bowl at night before you go to sleep. The next morning clean out the toilet bowl with a brush. The borax will loosen all the grime buildup.
Pests
Keep roaches, waterbugs, and ants away by sprinkling a combination of equal parts all-natural borax and sugar.
Flea Killer
Sprinkle borax on dog beds, carpets, and other areas where you suspect that fleas are hatching. Borax releases boric acid, which is a poison (note that very high doses would need to be ingested to harm a pet or human).
Mice Deterrent
Sprinkle borax on the floor along the walls (mice like to run along the side of walls). They don’t like getting the borax on their feet, so they are less likely to return to that area of the house.
Preserving Flowers
Fresh-cut flowers of many varieties may be permanently preserved. Borax removes moisture from blossoms and leaves, thereby preventing the wilting which would normally result. Two different mixtures (by weight) are recommended: two parts 20 Borax and one part dry white sand, or one part Borax and two parts corn meal.
Violin String Saver
If you play violin or an instrument with a bow, when the hairs get gummed with rosin, instead of having it rehaired, dampen a toothbrush, dip it in borax, and scrub the bow hair in small sections. Try not to get the soap on the wood. Wipe clean and then re-rosin.
“Goo Gone” Remover
Mix together borax and water in a 2-to-1 ratio. Rub on to get rid of sticky, gooey, gummy adhesive residue.
Better Homemade Candles
If you make your own candles, treat the wicks by soaking them in a solution of salt and borax to help reduce ash and eliminate smoke problems.
Cleaning Cookware
Borax is a mild and gentle cleaner for porcelain and aluminum cookware. Sprinkle on pots and pans and rub with a damp dishcloth. Rinse thoroughly.
Refrigerator Deodorizer
Spilled food can be washed away with a sponge or soft cloth using a solution of 1 quart warm water and 1 tablespoon of borax. Rinse with cold water.
Humidifiers
To help keep your humidifier free of odor, dissolve one tablespoon of borax per gallon of water and add it to the unit. Be sure to rinse out this solution before refilling your humidifier with pure water prior to use.
Shower, Tub & Tile
Sprinkle on a damp sponge or soft cloth and use as you would a powdered cleanser. This can even be used on fiberglass surfaces without scratching. Rinse thoroughly.
Remove Rust
Remove rust by mixing the above solution with a tablespoon of lemon juice.
Sink Cleaner
Remove stains from stainless steel or porcelain sinks with a paste or 1 cup borax and 1/4 cup lemon juice. Using a sponge or cloth, rub the stain with the paste. Rinse with warm water.
Outdoor Furniture
Mix 1 teaspoon dish detergent, 1 teaspoon borax and 1 quart warm water in a spray bottle and use to clean outdoor furniture.
Cat Litter Deodorizer
Minimize odor in your cat’s litter box by mixing a few tablespoons of borax in with the litter.
Garbage Disposal Cleaner
Clean and sanitize your garbage disposal by putting 3 tablespoons of borax down the drain. Let it sit for an hour and flush it with warm water.
Linens
Remove mildew and mustiness from linens by soaking them in 2 cups of borax mixed with 2 quarts of water. Let the linens sit for a few hours, then rinse clean.
Unclog Drains
Unclog drains with 1/2 cup of borax followed by 2 cups of boiling water. Let it sit for 15 minutes, then run your water for a few minutes to flush it out.
Clean Mattresses
Remove urine odor from a mattress. Wet the mattress, rub in borax with a damp cloth. Let dry, then vacuum up the remaining residue.
Garbage Can Deodorizer
Deodorize your garbage pail by filling it with borax and water. Let it soak then rinse it out. Sprinkle some borax in the bottom once it’s clean. This will keep the bugs away and absorb any odor causing moisture.
Kill Weeds
Useful for weeds that surface in concrete cracks and on walkways, but shouldn’t be used in the garden because it will also kill your plants.
Shine China
Make your worn china sparkle again by soaking in a sink full of warm water and a 1/2 cup of borax. Rinse well and wash a second time as usual.
Clean Hairbrushes and Combs
Mix a quarter cup borax and a tablespoon of a grease cutting dishwashing liquid (like Dawn) in a basin of warm water. Swish brushes in the sudsy water, let soak, rinse, and let dry.
Mold Inhibitor
Make a thick borax and water paste. Smear it on the moldy area. Let set until dry (overnight or longer). Sweep up the powder, and rinse off the rest.
http://www.onegoodthingbyjillee.com
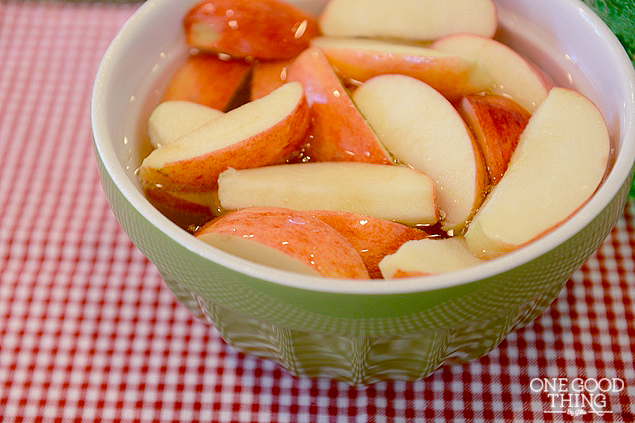
HOW TO KEEP APPLE SLICES FROM TURNING BROWN
Slice whole apples into wedges and put in a medium-sized bowl.
Pour in enough lemon-lime soda to barely cover the apple slices. Carbonated drinks like lemon-lime soda and ginger ale contain citric acid which is an effective anti-oxidant.
Allow the apple slices to soak for 10 to 15 minutes.
Take the apple slices out of the soda and package in snack-sized plastic zipper storage bags. (You can rinse the apple slices, if you like. I don’t.)
Store these “goodie bags” in the fridge for easy-to-grab snacks
http://www.onegoodthingbyjillee.com
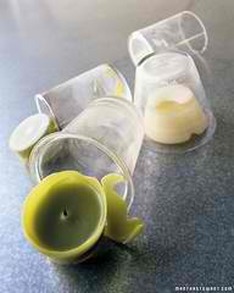
How to Remove Old Candle Wax from Glass Container
Place the container in the freezer for up to 2 hours. Remove from the freezer and wax will pop right out.
Place the container in the freezer for up to 2 hours. Remove from the freezer and wax will pop right out.
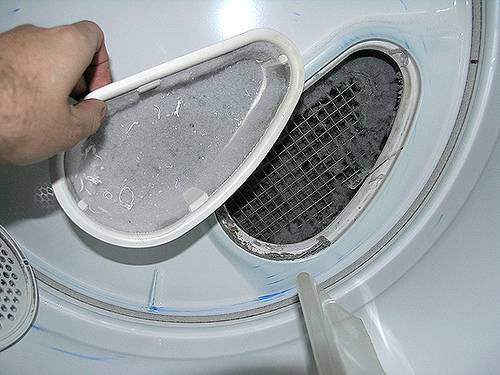
Info About Clothes Dryers: May Save Your Life!
The heating unit went out on my dryer! The gentleman that fixes things around the house for us told us that he wanted to show us something and he went over to the dryer and pulled out the lint filter. It was clean. (I always clean the lint from the filter after every load of clothes.) He took the filter over to the sink and ran hot water over it. The lint filter is made of a mesh material – I’m sure you know what your dryer’s lint filter looks like.
WELL…the hot water just sat on top of the mesh! It didn’t go through it at all! He told us that dryer sheets cause a film over that mesh and that’s what burns out the heating unit. You can’t SEE the film, but it’s there. It’s what is in the dryer sheets to make your clothes soft and static free – that nice fragrance, too. You know how they can feel waxy when you take them out of the box? Well, this stuff builds up on your clothes and on your lint screen.
This is also what causes dryer units to catch fire & potentially burn your house down with it! He said the best way to keep your dryer working for a very long time (& keep your electric bill lower) is to take that filter out & wash it with hot soapy water & an old toothbrush (or other brush) at least every six months. He said that makes the life of the dryer at least twice as long!
http://heartofwisdom.com
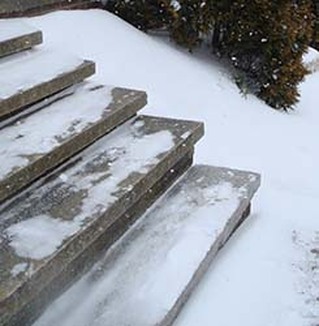
SIDEWALK DE-ICER
For icy steps and sidewalks in freezing temperatures, mix 1 teaspoon of Dawn dishwashing liquid, 1 tablespoon of rubbing alcohol, and 1/2 gallon hot/warm water and pour over walkways. They won’t refreeze. No more salt eating at the concrete in your sidewalks
http://www.onegoodthingbyjillee.com
For icy steps and sidewalks in freezing temperatures, mix 1 teaspoon of Dawn dishwashing liquid, 1 tablespoon of rubbing alcohol, and 1/2 gallon hot/warm water and pour over walkways. They won’t refreeze. No more salt eating at the concrete in your sidewalks
http://www.onegoodthingbyjillee.com
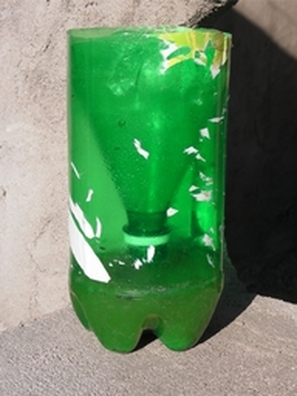
Mosquito Trap
1. Cut the top (just before the start of the cone) off a 2 liter bottle. Invert the cone and place it inside the straight part of the bottle.
2. Glue the two pieces together, using a glue or silicon.
3. Add 1 tsp yeast and ½ cup sugar to some lukewarm water, and pour the mixture into the bottle.
Mosquitoes are attracted to the carbon dioxide that you exhale. The yeast feeds off the sugar and emits the same gas, so the mosquito enters the bottle, thinking she will find food there. She cannot then get out.
You can use the same bottle design for a fly trap, but fill it with a putrid smelling liquid. For wasps, use a sugar mixture.
http://www.velacreations.com
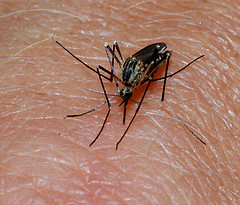
Cheap, Easy Tips for Keeping Mosquitoes Away
Repurpose your spent coffee grounds by letting them dry and age for about a month in an open container, then sprinkle them in puddles and other standing water to kill mosquito larva. (NOTE: Do not use in fish ponds or elsewhere when other aquatic life is present.) Leftover brewed coffee can also be applied as a spray to weeds and outdoor surfaces, since mosquitos hate its aroma.
Marigolds planted in the garden or yard not only look pretty and are easy to grow, but their scent deters a wide range of outdoor pests, including mosquitos.
Hang strips of fabric softener sheets adjacent to outdoor lights, but not in direct contact with the bulb or fixture; the heat from the light will slowly diffuse chemicals in the sheets that repel mosquitos and other nighttime flying insects.
When barbequing outdoors, throw a handful of sage, rosemary, or – once again – spent coffee ground (dry) on the fire to keep mosquitos away.
Lemongrass is an attractive annual to plant in the yard or in a container during the summer, and the stalks can be used in cooking as well as crushed and rubbed on the skin to chase away mosquitos. You can also infuse crushed lemongrass stalks in rubbing alcohol to make a skin-safe tincture spray that mosquitos hate.
Did you know that a single bat can eat up to 1,000 mosquitos in an hour if he’s really hungry? Invite more bats into your neighborhood by building a bat house. It’s a perfect way to use up scrap lumber.
And finally, crush a dozen cloves of garlic and simmer them in two cups of water on the stove for 30 minutes. The resulting tonic can safely be safely sprayed on outdoor surfaces, including picnic tables, as well as on the skin in order to keep mosquitos at bay.
http://blog.aarp.org/
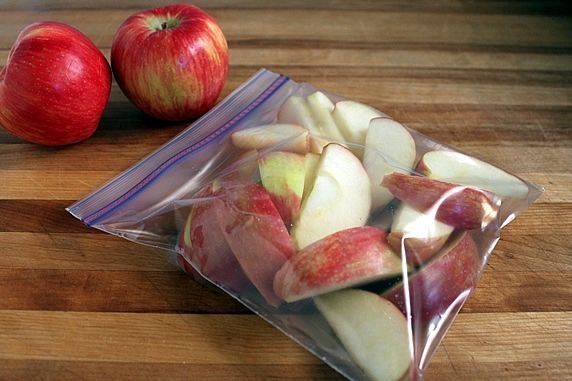
Those packages of pre-sliced apples you can buy at store are great for a healthy snack on the go but the price can add up. Make your own by slicing apples, soak in cold water for 3-5 minutes, then soak in a lemon-lime carbonated soda (such as 7-up or sprite) for 3-5 minutes. Divide into snack size portions and store in Ziploc bags in the fridge. The lemon-lime soda will keep the apples from browning and make them last longer.
http://theyummylife.com
http://theyummylife.com

MAKE YOUR FRESH CUT FLOWERS LAST LONGER
1teaspoon sugar
1 teaspoon household bleach
2 teaspoons lemon (or lime) juice
1 quart of lukewarm water
Instructions:
Fill a container with 1 qt. of warm water. Add 1 tsp. sugar, 1 tsp. chlorine bleach and 2 tsp. lemon or lime juice to the warm water. Place a lid on the container, and shake.
Pour into flower vase (or mason jar). :-)
http://www.onegoodthingbyjillee.com
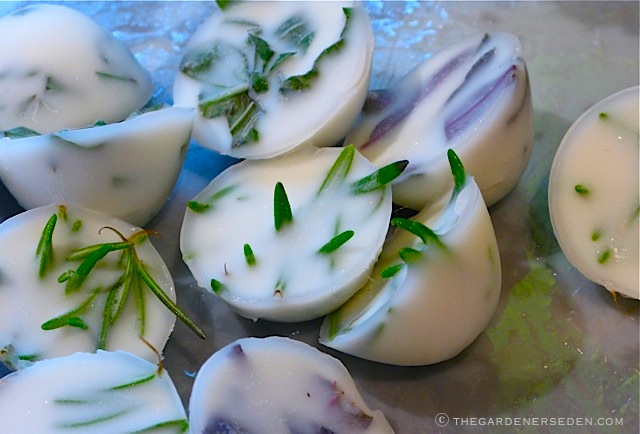
Fresh-Frozen Herbs in Oil, Butter, Broth or Water
Begin by gathering empty ice cube trays (or egg cups or small freezer molds), zip-lock or other storage bags, and bundles of fresh herbs from the garden. Bring the herbs inside, and as you wash, dry and pick through the leaves, think about how you might like to use them over the coming months. Do you make lots of soup in winter? Set aside a few bundles of your favorite soup herbs. These can be frozen in cubes of room-temperature water, vegetable broth or chicken/beef bouillon. Do you like to fry or roast with herbs? Bundles of your favorite cooking herbs can be preserved by freezing them in vegetable oil (I like to use light olive oil for high-temp pan frying). If you like to use herb butters or herb-infused oils for bread dipping, you can freeze them in butter (softened or melted over very low heat and cooled a bit) or in extra virgin olive oil, to pull out of the freezer later and enjoy at room temperature all winter long.
Separating Fresh Herb Leaves for Simple Frozen Oil Cubes
Tear or chop the herbs into small pieces or individual leaves, depending upon how you plan to use them at a later date. Next, load ice cube trays, egg cups or other freezer molds with the clipped herbs. You can separate individual herbs into molds or you can mix them in combinations you frequently use together. I make both individual herb cubes and various combinations. I started with olive-oil cubes for pan-frying this time. Once my compartments were filled with herbs, I began filling the cubes with oil, topping each herb mold with one or two tablespoons of light (frying) olive oil. Then I made herb cups with melted butter and extra virgin olive oil. Finally I put away large quantities of herbs preserved in vegetable broth (you can use any kind of broth) and water (for herb tea and soup).
Once the molds are filled, freeze them overnight. You may wish to make a note of the herb content and oil/water measurement in each tray. Once frozen, it can be tricky to identify the herbs. I do freeze in batches and make notes to avoid confusion later. Once removed from the freezer, pop the cubes from the trays and slip them into labeled plastic bags. I write the name(s) of the herbs, the fluid measurement, and the date on my bags. Then, I store them flat in the freezer (they should remain in separate units, unless they melt – so work quickly!). Now, you can enjoy fresh herbs in your cooking all winter long, at a fraction of the market cost!
http://www.thegardenerseden.com
How to Freeze Basil
If you're a gardener who's growing basil, here are my step-by-step instructions on how you can freeze your basil to use all through the winter.
Trim your basil, it will actually produce more leaves if it's vigorously trimmed a few times each year, since everywhere you cut the stem it produces two new stems. Just be sure to keep a few leaves on each stem (remember high school botany, that's where the plant gets food.)
Pinch off all the basil leaves, discard the stems, and wash the leaves very well in a salad spinner. Spin them as dry as you possibly can. If you don't have a salad spinner, just wash your basil leaves in the sink and dry them well with paper towels.
Put a few of handfuls of basil into the food processor, using the steel blade. The food processor bowl should be full, but not tightly packed.
Pulse the food processor with one hand and drizzle olive oil into the feed tube with the other hand, just pulsing until the basil is coarsely chopped. You should make sure that all the basil is coated with oil too, which keeps it from going dark in the freezer. I use about 2-3 tablespoons of olive oil for each batch in the food processor when I'm making coarsely chopped basil like this to use for pasta sauce, soup, or stew during the winter. When I'm making basil puree to add to basil vinaigrette I use more oil and chop the basil much more finely.
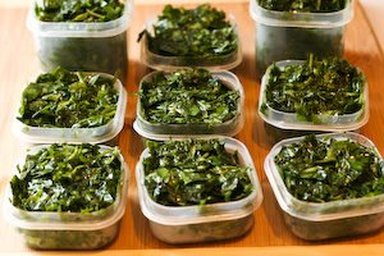
I have two sizes of these little plastic containers with tight lids that I use to freeze the basil. It doesn't matter what size container you use, but a good trick is to measure the containers before you first use them. That way, when you pull one out of the freezer for a recipe, you'll know how much it is.
http://www.kalynskitchen.com
If you're a gardener who's growing basil, here are my step-by-step instructions on how you can freeze your basil to use all through the winter.
Trim your basil, it will actually produce more leaves if it's vigorously trimmed a few times each year, since everywhere you cut the stem it produces two new stems. Just be sure to keep a few leaves on each stem (remember high school botany, that's where the plant gets food.)
Pinch off all the basil leaves, discard the stems, and wash the leaves very well in a salad spinner. Spin them as dry as you possibly can. If you don't have a salad spinner, just wash your basil leaves in the sink and dry them well with paper towels.
Put a few of handfuls of basil into the food processor, using the steel blade. The food processor bowl should be full, but not tightly packed.
Pulse the food processor with one hand and drizzle olive oil into the feed tube with the other hand, just pulsing until the basil is coarsely chopped. You should make sure that all the basil is coated with oil too, which keeps it from going dark in the freezer. I use about 2-3 tablespoons of olive oil for each batch in the food processor when I'm making coarsely chopped basil like this to use for pasta sauce, soup, or stew during the winter. When I'm making basil puree to add to basil vinaigrette I use more oil and chop the basil much more finely.
I have two sizes of these little plastic containers with tight lids that I use to freeze the basil. It doesn't matter what size container you use, but a good trick is to measure the containers before you first use them. That way, when you pull one out of the freezer for a recipe, you'll know how much it is.
http://www.kalynskitchen.com
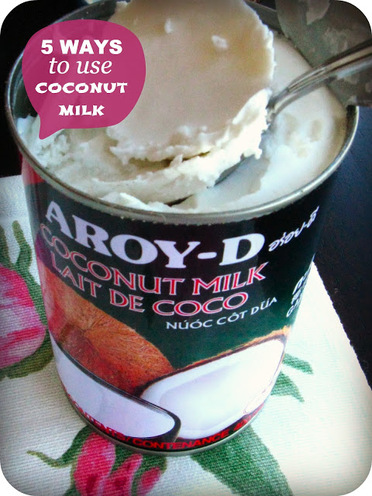
Five Ways to Use Coconut Milk
Coffee Cream: Whether you use it straight out of the can to substitute milk in your coffee or chill it overnight and use the coconut fat to whip up an over the top delicious coffee cream, I promise you, you’ll love it!
Smoothies: Add coconut milk to your smoothie for a creamy, fresh, electrolyte-packed drink. Say goodbye to sports drinks forever!
For Baking: I’ve used coconut milk to substitute many recipes that call for milk and it’s always turned out great.
Coconut Ice Cream: It couldn’t be any easier to make. You don’t need an ice cream machine. A blender will do. Try countless variations for a sweet, light, healthy dessert.
In Your Bath: Add two cups of full-fat coconut milk to your bath. The after effects: soft, smoothy, glowing skin.

Cutting Brownies
Use a plastic knife when cutting Brownies for an even cut.
Use a plastic knife when cutting Brownies for an even cut.
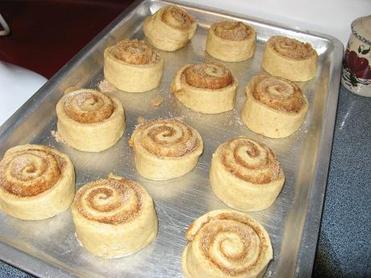
Tips for Making Perfect(ish) Sweet Rolls
1. Start with a good recipe.
2. Proof the yeast. Mix the yeast and a little water and sugar from the recipe, and let it sit for a few minutes. The yeast should activate and “grow”. This photo had 1/2 cup of water. The yeast has already made it past the 1 cup line.
3. Don’t add cold ingredients to the mix. Yeast likes warmth. Warm any liquid that will come in contact with the yeast. I even set my eggs in a cup of warm water before cracking and adding them. Don’t want to shock the yeast!
4. Let your dough rise in a CLEAN, oiled bowl. I just take my mixing bowl and give it a little scrub. Then I swirl about a tablespoon of oil before dropping the kneaded dough in to rise. Makes getting the dough out so much easier! Also, I have less sticky dried-on dough to pull out of the bowl and probably waste. And the dough rolls out better with that little bit of oil coating! (Bonus Tip: Don’t knead the dough too much. Just enough to handle it easy. Overworking your dough makes for tough rolls.)
5. Roll out in a thin, even rectangle. Easier said than done, I know. If you’re prone to rolling out an odd oval shape, try rolling from the middle to the outside corners of the dough. Then roll along the edges to even it out.
6. Use butter. Use butter instead of oil or shortening or whatever in the recipe, and spread your rectangle with a generous amount of butter before rolling it up.
7. Sprinkle evenly the brown sugar, white sugar, and cinnamon. Don’t skimp on the edges! Using both sugars adds a yummy gooeyness.
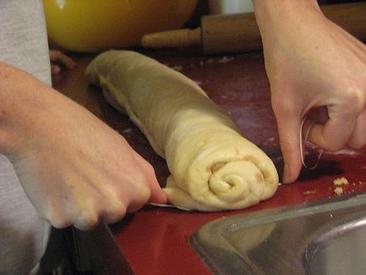
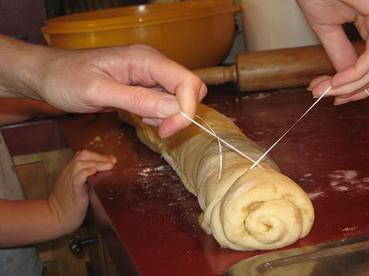
8. Squish the roll, then floss your rolls. Once I roll up my rectangle, I squish the ends in. That makes for a more uniform cut without wimpy, odd-shaped end pieces. I never use a knife to slice my rolls. Slicing with dental floss provides a much cleaner cut without squishing the rolls.
9. Leave plenty of space for the rolls to rise. The pan in this picture is an 11×15 with 12 cinnamon rolls. If your rolls are too crowded they won’t rise as pretty, and the texture will be compromised.
10. Use a thinner icing and cover thoroughly.
http://whatscookingamerica.net
1. Start with a good recipe.
2. Proof the yeast. Mix the yeast and a little water and sugar from the recipe, and let it sit for a few minutes. The yeast should activate and “grow”. This photo had 1/2 cup of water. The yeast has already made it past the 1 cup line.
3. Don’t add cold ingredients to the mix. Yeast likes warmth. Warm any liquid that will come in contact with the yeast. I even set my eggs in a cup of warm water before cracking and adding them. Don’t want to shock the yeast!
4. Let your dough rise in a CLEAN, oiled bowl. I just take my mixing bowl and give it a little scrub. Then I swirl about a tablespoon of oil before dropping the kneaded dough in to rise. Makes getting the dough out so much easier! Also, I have less sticky dried-on dough to pull out of the bowl and probably waste. And the dough rolls out better with that little bit of oil coating! (Bonus Tip: Don’t knead the dough too much. Just enough to handle it easy. Overworking your dough makes for tough rolls.)
5. Roll out in a thin, even rectangle. Easier said than done, I know. If you’re prone to rolling out an odd oval shape, try rolling from the middle to the outside corners of the dough. Then roll along the edges to even it out.
6. Use butter. Use butter instead of oil or shortening or whatever in the recipe, and spread your rectangle with a generous amount of butter before rolling it up.
7. Sprinkle evenly the brown sugar, white sugar, and cinnamon. Don’t skimp on the edges! Using both sugars adds a yummy gooeyness.
8. Squish the roll, then floss your rolls. Once I roll up my rectangle, I squish the ends in. That makes for a more uniform cut without wimpy, odd-shaped end pieces. I never use a knife to slice my rolls. Slicing with dental floss provides a much cleaner cut without squishing the rolls.
9. Leave plenty of space for the rolls to rise. The pan in this picture is an 11×15 with 12 cinnamon rolls. If your rolls are too crowded they won’t rise as pretty, and the texture will be compromised.
10. Use a thinner icing and cover thoroughly.
http://whatscookingamerica.net

Look at the directions on the cake mix,
Add one more egg (or add 2 if you want it to be very rich),
Use melted butter instead of oil and double the amount
Instead of water, use milk
Mix well and bake for the time recommended on the box
http://www.bronzebudgetbride.com
Add one more egg (or add 2 if you want it to be very rich),
Use melted butter instead of oil and double the amount
Instead of water, use milk
Mix well and bake for the time recommended on the box
http://www.bronzebudgetbride.com
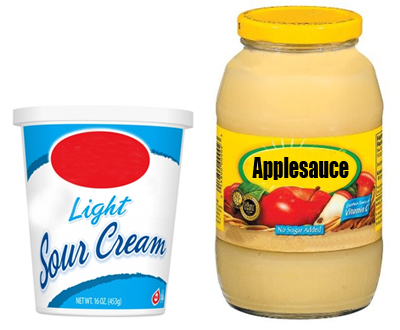
Skinny Up Your Cake Recipes
If a recipe calls for 1/2 cup butter and you substitute 1/4 cup applesauce for half of the butter, you’ll save 44 grams of fat and 400 calories!
To lighten up cakes and cupcakes, replace the fat with the same amount of light sour cream and natural applesauce. For example, if the box calls for 1/2 cup oil, replace it with 1/4 cup light sour cream and 1/4 cup applesauce. The cake is moist without being greasy and tastes great!
http://www.onegoodthingbyjillee.com
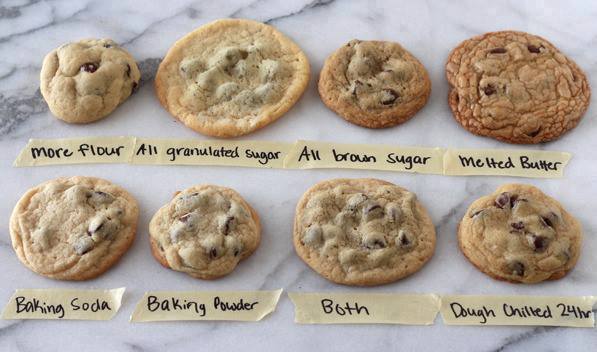
Chocolate Chip Cookies Secretes
Have you ever wondered why chocolate chip cookies can be chewy, crisp, soft, flat, thick, cakey, greasy, bland, flavorful, moist, or crumbly?
This shows how various ingredients and techniques can affect the taste, texture, and appearance of your chocolate chip cookies. This will hopefully help you understand how chocolate chip cookies work so you can make the PERFECT batch every time, whatever you consider to be perfect. This information will allow you to alter or create your own chocolate chip recipe that produces cookies just the way YOU like them.
Baking Powder:
Removed baking soda from recipe and used 1/2 teaspoon baking powder. This produced results that were more cakey and puffed while baking.
Baking Powder AND Baking Soda:
Used 1/4 teaspoon baking powder and 1/4 teaspoon baking soda. This produced results that were crisp at the edges, soft in the middle, with a good amount of spread. The combination of the two leaveners produced the best results in my opinion.
MORE Flour:
Increased the flour to 2 cups (250 grams) which created a more crumbly dough and very little spread. The cookies were small yet thick and relatively undercooked (ooey and gooey) in the middle.
MELTED Butter:
I replaced the room temperature butter with melted and cooled butter. Instead of creaming the butter and sugar with an electric mixer, I simply stirred the butter and sugars together then let sit for 5 minutes, until the sugar was better absorbed by the butter. This produced flatter cookies that had a shiny, crackled top reminiscent of brownies. They were also more crisp at the edges.
All Granulated Sugar:
I used 3/4 cup granulated sugar in this recipe which produced flat, white, chewy, and slightly crunchy cookies but with little flavor. Since baking soda (called for in the control recipe) requires an acid (such as brown sugar) to react, these cookies fell very flat as you can see by the way the chocolate chips protrude.
All Brown Sugar:
I used 3/4 cup packed light brown sugar in this recipe which produced thick, brown, and soft cookies with an intense butterscotch flavor. The original control recipe uses an even ratio of granulated and brown sugars. If you prefer your cookies to be flatter, chewier, or crisper, use more granulated sugar. If you prefer your cookies to be softer and thicker and have a pronounced butterscotch flavor, use more brown sugar.
24 hour CHILLED Dough:
I used the control recipe but chilled it in the fridge for about 24 hours before shaping and baking. This produced cookies that were slightly thicker, chewier, darker, and with a better depth of butterscotch flavor. If you have time, try chilling your next cookie dough for at least 24 hours, or up to 48 hours.
